

Kitchen Table to Coffee Table
- Jan 3, 2023
- 3 min read
Over the summer after moving to a new place, I ended up with an extra kitchen table that I no longer needed as a large table, but I didn't want to get rid of it because it was a good table and I wasn't sure if I would need it again down the line. There wasn't really a good place to store it either, so I wanted to find a way to turn it into something that could actually be used, so I decided to turn it into a coffee table!
I knew I wouldn't need the taller table legs, so taking those off was the first thing I did. Then I had to think about what needed to be done to the table top part in order to make it work as a coffee table. The table had extensions in it that allowed it to either be a longer oval or a smaller circle. For a coffee table I wanted the smaller circle shape, but I wanted the extension to still be on option just in case it ever needed to be used as a kitchen table again, so I didn't completely remove those parts. For the look, the table was an orangey brown color that didn't match any other furniture in the house, so I needed to sand the table as much as I could to prepare it for priming and painting!

Although it was a nice sturdy table, it wasn't a solid wood table, I think it was originally from Ikea. It had the appearance of wood but had veneer on top. so I wanted to sand it enough to where it would be able to be primed and painted, but not so much that it removed the entire top layer. Thankfully it was a nice day outside so I was able to enjoy the weather, blast some music, and get in the sanding zone!
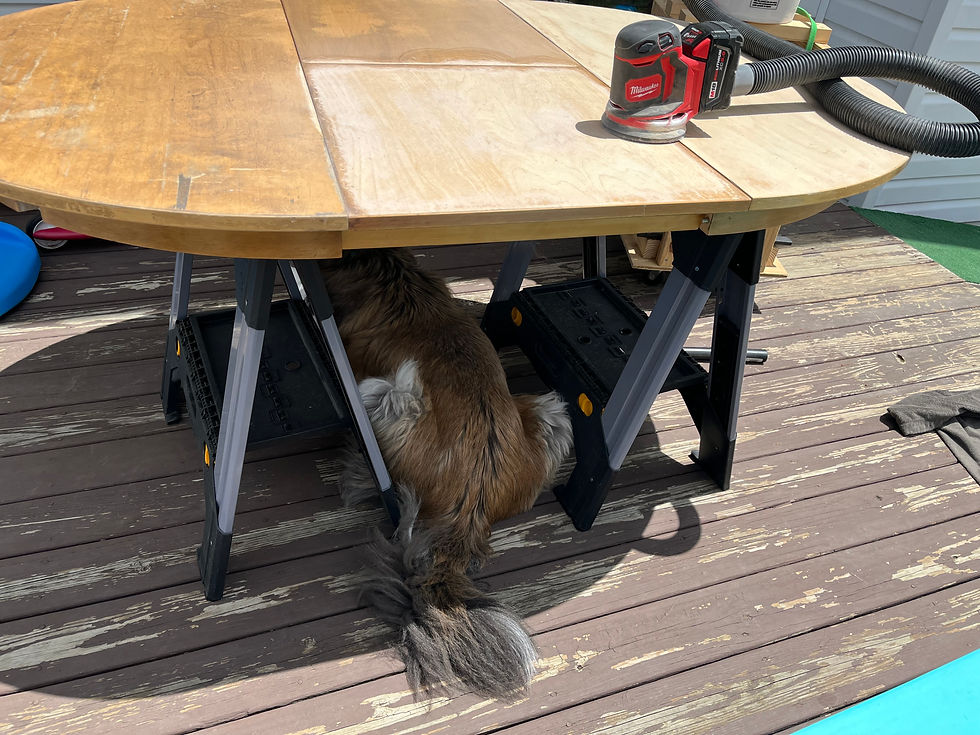
Now I know I've mentioned before that my dog likes to hang out and be in the middle of these projects with me, and this shows that it was not an exaggeration to say he demands on being RIGHT IN THE MIDDLE of it all! Thankfully the sander was hooked up to a vacuum system, so saw dust wasn't getting everywhere or making it harmful for him to be there with me!

It's pretty cool how the sander can be hooked up to a shop vac, and the shop vac hooked up to another container that fills with the saw dust! It makes it pretty loud since you have to have the sander and shop vac both turned on while sanding, but definitely worth it!
After getting the top sanded and smooth, I did the sides and underneath parts by hand. Then after I wiped it all down it was time for priming and painting!

After all the paint dried, it needed some kind of top coat. After I got that on, that's when I came to some problems.....
I'm not sure if it was the specific top coat I used (I don't even remember what it was) or if it was the humidity at the time, but the whole thing started to peel off like a sunburn...

I basically had to peel off the whole table and do another round of light sanding and painting..... it was a late night!

And of course Loki had to be right there with me! I would do a coat of paint and then wait a couple hours and then do another one to make sure it was fully covered and even all the way around. The color was looking good, but it seemed like each time I painted, a little fruit fly or knat wanted to go land on my table and get stuck in the paint! I had to fix multiple spots where that happened, and I was getting a little frustrated with how much this table seemed to not want to be painted! There was also a Loki hair I found in the paint, so after fixing that part I decided he was not allowed to be near any other painting part of the projects again! I would just have to suffer through his vocal complaints. SOOOOO after multiple re-attempts of painting, I finally got that part done! Then I used a different top coat and put it in a paint sprayer that time and it turned out much better the second time around!
The table part was done, so then all that was left was the legs! We ordered shorter metal legs had a cool look to them but also were sturdy and able to fold in, I think they turned out pretty cool!


Comments